Tuesday, 24 January 2017

Within these walls

Had a wonderful stitchy time at our January meeting. So many wonderful items made and still being worked on. I have to say that there are so many different viewpoints and ideas going on, I am inspired and then want to change everything I have done! But then that's why we work so well together!

The theme for the day was Within These Walls. I was going for more of a realistic style wall thinking of using the flour and gesso pieces I made last year and others were looking at more textured pieces or using threads to create the layers.

Here are a few photos of what everyone was doing .....
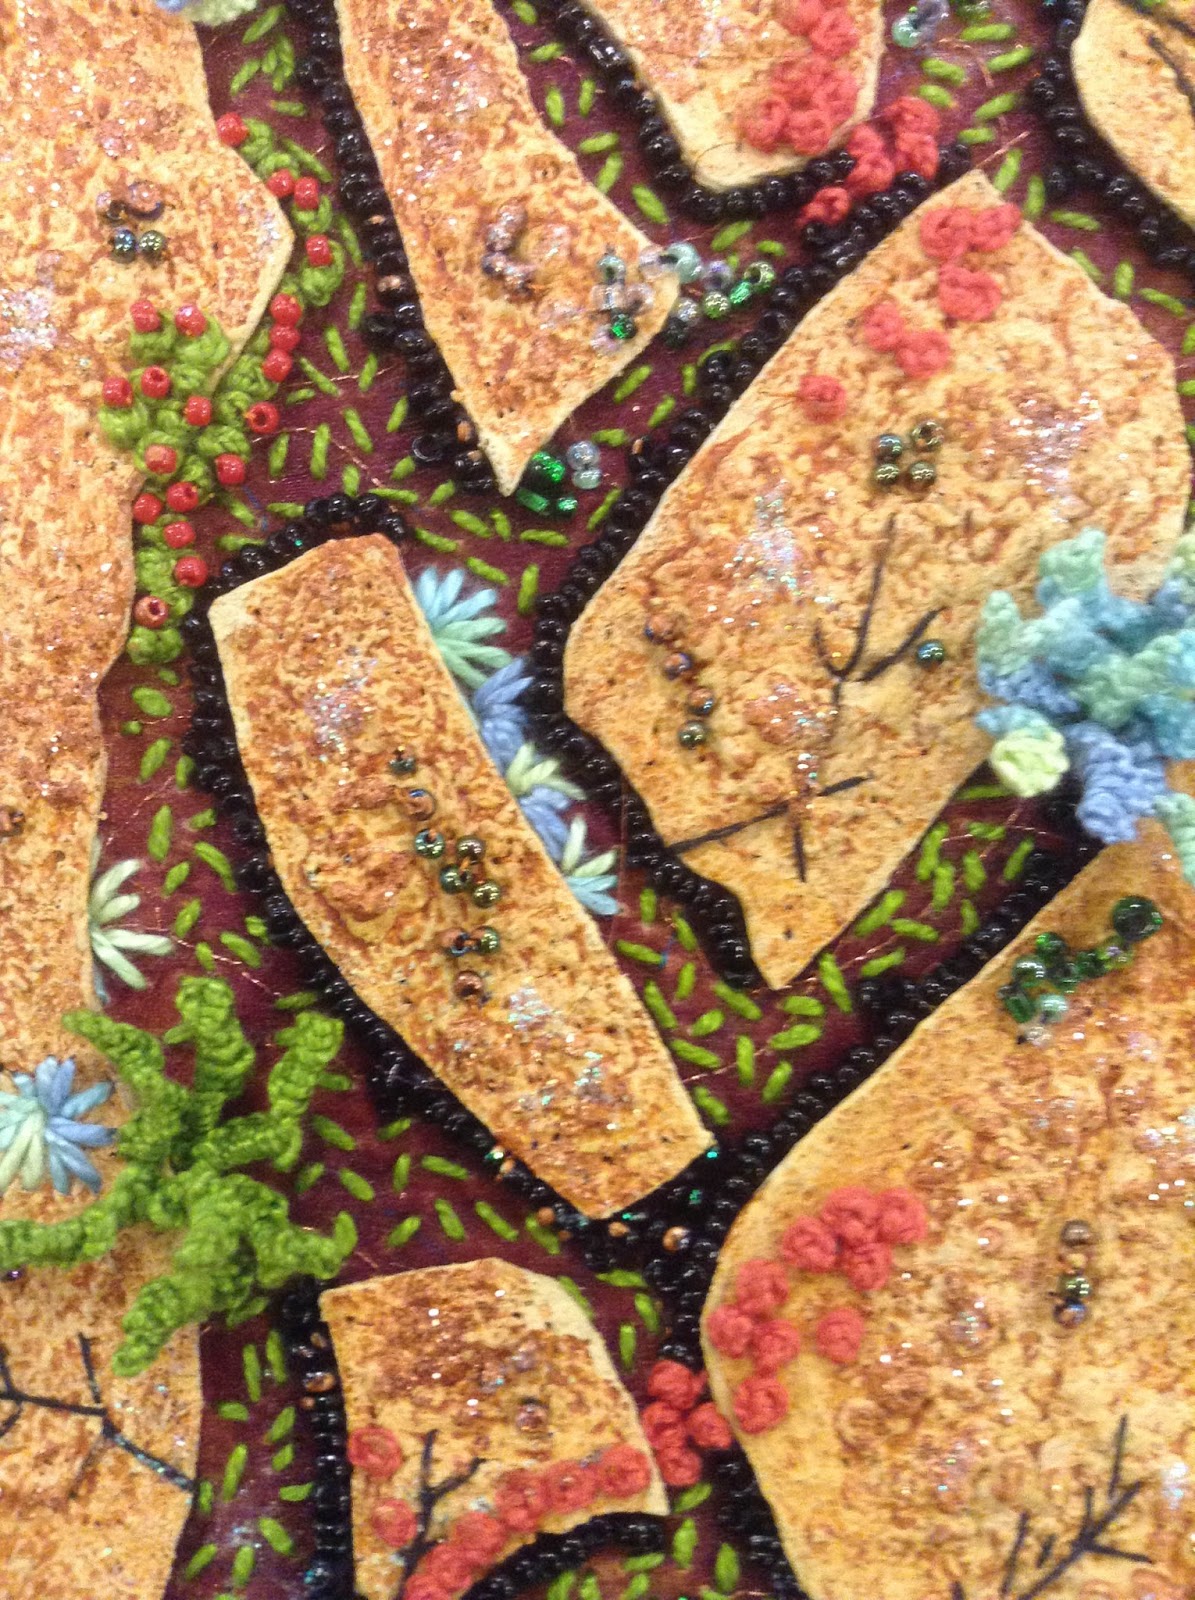

Averil has finished her piece on cracks. Loving the textures and stitching. Beautiful and so effective.


Also more wonderful book covers have been completed. Thank you to Pauline for her wonderful tutorial. The covers are so diverse and wonderful. This is Averil's book cover, I love the stencilling and the Autumn colours and textures. I can't wait to see what you do inside Averil.....


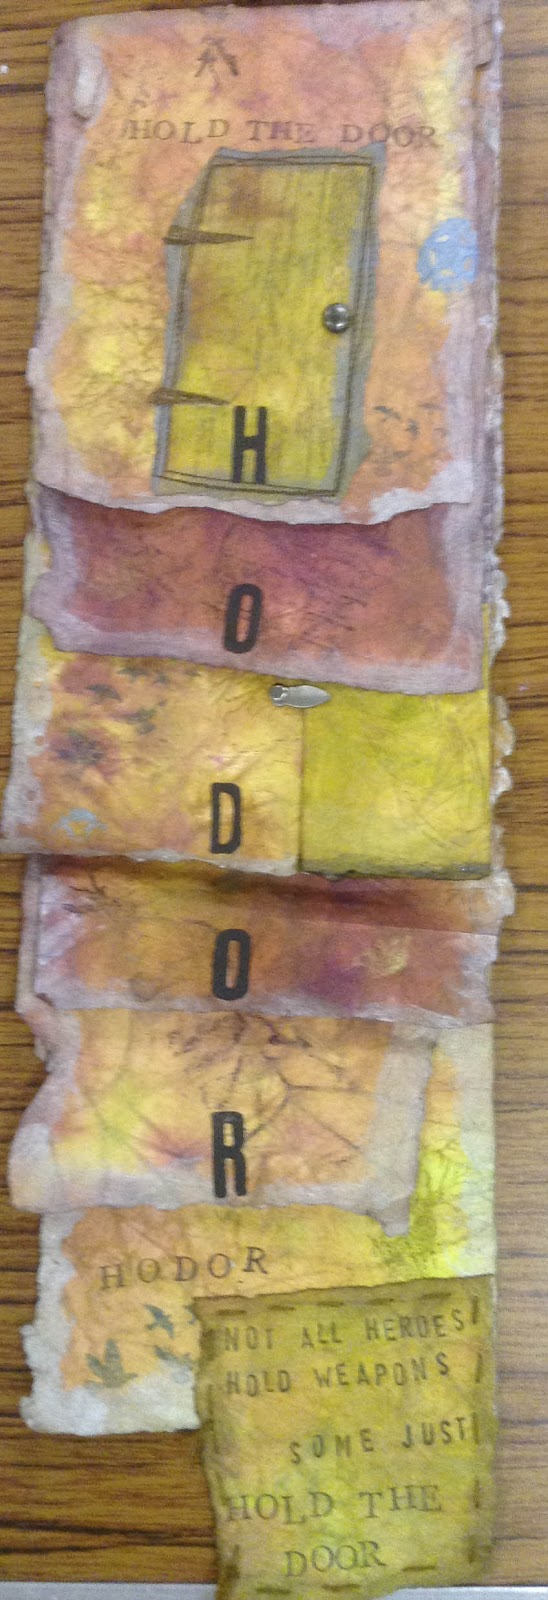
Caroline took a very different approach and layered her book pages to create a longer book. It would be an amazing  wall panel. The  colours used look like old leather. The wording is a tribute to a very well loved character from Game of Thrones... do you know it ??? 
I absolutely love this and am so taken with the way you have made your book, such a wonderful idea Caroline.



Mel used texture paste and wonderful colours to create a watery, underwater theme to her book cover. I love the stencil you've used, the texutres just pop off the cover and make it look more like fish scales or skin. Again what is going to go inside ???? 


Mel also used the same stencil to create a very different effect using different colours and tones. I love the colours and the way you have created such a mystical look. We are so going to have to have a day working on the insides of these books! 


Some of us started our Within These Walls pictures. I only have a few - sorry- Please can you bring your pieces with you to the next meeting so that I can take more photos! I've not started mine yet. I was going to go for the realistic wall idea which had a big crack across it and then I was going to join the two pieces together with some webbing or holes and threads. I've totally changed my mind on this and am now working on a more abstract idea on Within These Walls- not based on actual walls at all! But we'll see if that gets going it's only dancing around my brain at the moment! 

Ellen was working on some lovely textures using fabrics, I am very curious as to how this is going to turn out. Would love to see what happens next .....

Loving the colours on the painted background too- how is this going to work together???


Sheila was experimenting with Kozo fibres. I bought some of these years ago but didn't really know how to use them so am very interested to see what you do with them. Here is the beginning picture and I await the next step in the February meeting! 


Caroline also showed us her wonderful cuff that she has made from a piece that she hand felted. I love the shape and the beautiful stitching that you have used. This is gorgeous.


So much going on ladies ! I'm loving all the different projects. I appologise if I have not added photos of anything that you wanted me to display. If so please bring your pieces with you to our February meeting and I'll take the photos then.

Here's to a busy fortnight before our next meeting. Can't wait to see how things have developed! 


Wednesday, 4 January 2017

Paper Stitch piece

Well since I'm on here thought I would post my paper piece.
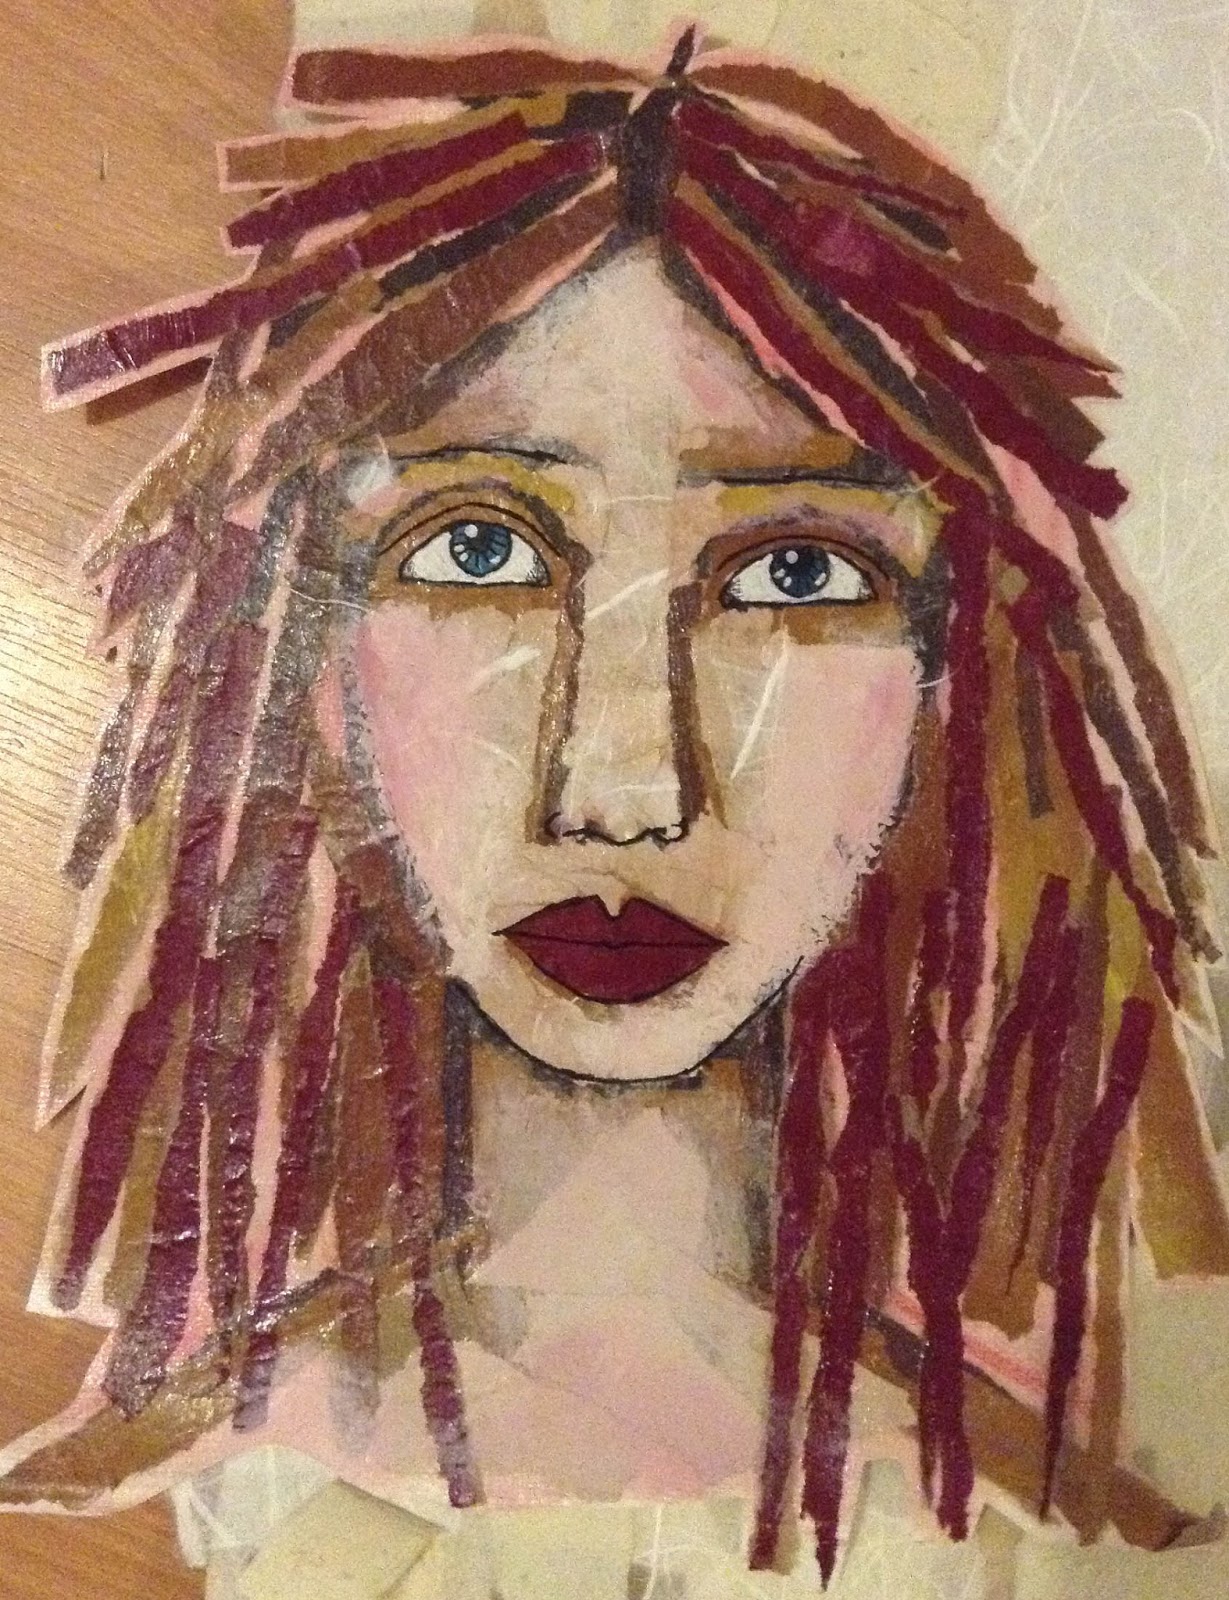
I had started to create a face using torn pieces of paper on a canvas which I quite enjoyed doing. I added a little warm colour just to the cheeks but the colour did spread out since I used the same brush for the glue!

I was worried she was a little thin in the face so I made her face a little more rounded and when I cut her out she did seem a lot better.

I created the background by just tearing lots of different types of paper and ironing them to calico using bondaweb. There were a few loose ends however but I opted to solve them by adding stitching.

I did like the rough feel of the paper. I wanted to add the face but wasn't sure where and then there was an awful lot of empty space. I had thought of adding more faces and have been quite taken by textile artists that just create line drawings in stitch. So I thought it would be interesting to just draw out the faces but not colour them so that the only colour was my torn paper girl.
I must admit that I really liked the effect and am quite taken with this line drawing in a darker thread.


The background however still needed something to fix in all the loose ends of the torn paper and something to tie it all together. So I opted to have a go at script and put it sideways to make it look more like a pattern. Also I used a brown thread to push it back into the background as I didn't want to overshadow the faces. I chose a quote by Helen Keller as I really liked it! 
It says

The best and most beautiful things in the world
 cannot be seen or even touched 
- they must be felt with the heart.

Here is the finished piece. I don't think that I want to add anything further to it.

Please let me have copies or bring along your paper stitched pieces with you to the next meeting and I can post them here. If you would like to add any commentary about how you made your piece that would be wonderful too.


Meeting- 6th January

Happy New Year everyone! 
Can you believe it is the start of another year. How time flies!!!

Well the first meeting of the new year has the title Within These Walls. I am going to have to have a good think about what that means for me. I've not done a Pinterest Board on that topic either so might have to have a little research look-see.

Hopefully everyone had a lovely restful Christmas and are ready for the year ahead. Hopefully everyone can make it and we can have a look at any updates on the work you have started- I've finished my paper and stitch piece which I'm quite pleased with. Please bring with you anything you would like me to add to the blog to either your pictures sections or the posts.
I'm still working on the Cracks piece although I might leave that one for a bit as I'm a little stuck with it and try and move onto this topic instead.

If I receive any more information I'll add it here but looking forward to seeing you on Saturday.
Take Care!!!

Tuesday, 15 November 2016

Next meeting

Just to remind everyone that the next meeting is the Christmas meet! Wow hasn't that come around quick!
But for our Christmas meet we have a present swapsie so don't forget to get a little something (to the value of £5) not much so that we can have a little mini raffle and swap of pressies!
Also if possible could you also bring a little something to use as prizes in our games and activities.

If anyone has any ideas or activities that we could make or do on the day then please let me or Mel know so that we can make sure that everyone knows if they have to bring something (like sewing machine and sewing equipment).

Can't believe it's almost Christmas, I had better do some Christmas shopping!


Beautiful finished canvas

Mel shared her gorgeous finished canvas on Saturday. She had made her base fabric from felt and added stitching and embellishments to great effect. I love the way she has presented the canvas, I love the stitching around the edge it adds such a dimension to her work. The colours are gorgeous too!
Take a look at the amazing details.


So beautiful, thank you Mel

If anyone has any work they would like me to add tot the blog please let me know! 


Making books

We also had a great time playing with paper and dyes to make a paper book. Thank you so much Pauline for a wonderful demonstration and the materials for us to play!

I loved the books that Pauline had made and she showed us how she achieved the colour effects on her paper book. I was surprised to see it was made from wallpaper lining too.

The Koh-I-noor watercolour dye sets were wonderful. They gave such wonderful vibrant colours. We all made our parcels (of paper and colour!). How did your books turn out??? Please let me know or send me photos as I'd love to see what colours and patterns were created.

I made a brown and a blue book. The dye was great at running into sections and creating lines and patterns as well as diffusing into the paper and making lovely grades of colour.

I have decided to combine the book cover experiments from Mel with my paper book and have made some hard covers (my gesso wasn't stiff enough) and am planning to make hard covers for my little books.

Here are some photos from the day. Please bring your books if you have finished or sewn them to the next meeting as I would love to see how they developed.

Would also be great to think about creating the pages

ordinary lining paper ! what a wonderful idea! 


Pauline's amazing books- I wonder what we could create for the inside.....?


These were how mine turned out after I had "unwrapped" them. I was really pleased with the colours they are so vibrant. 


The dye even took hold on the baking paper. I am sure that we can do something with this.

We also made some paper fabric using different papers, fixing them to the fabric with PVA. This forms quite a durable "paper" fabric that can be cut and stitched and applied to other surfaces. 


Angela added some tissue paper and the dye from the paper created a wonderful design on the opposite side! Lush! 


Using tissue and other "additions" to create a beautiful surface from Mel. How did this dry?? Is it soft enough to take stitching?

What an amazing day! 
We did so much and I thoroughly enjoyed it. I am so pleased with my little books and am busy trying to think of what theme I can have to develop the pages.

Making book covers!

Thank you so much Mel for a great morning making very squidgy and texture-tastic book covers. I am looking forward to seeing how they have dried and if anyone has added anything further to their covers. I was amazed at how hard the cover was when dry (when made with the PVA). My gesso covers aren't that strong, they are still quite pliable and can be bent and manipulated a little more. I decided to paint some with black gesso and will add some metallic paints onto them with a dry brush or maybe mix mica powders with acrylic gel medium. This always works well with picking up textures. I am not sure what I will do with the other gesso pieces I made as I think they could work well as a background for something. I think I might need to make holes in the fabric first as I think hand sewing might be tough on the fingers!

But I was intrigued by the different things that everyone mixed their PVA flour mix with. Would love to have some "after" pictures to go with the following!


These were made with gesso and flour. The pieces were added later and pushed into the wet gesso mix.


This is the flour and PVA mix, not sure what has been added looks like some seeds and sawdust. The flour/ PVA created some lovely sections of smooth lumps and bumps!


Angela used some fabrics to create her page, I love the mix of colours and designs. Did you add PVA to this??


You can also draw into the wet flour/ PVA mix. This will look amazing when it's painted. Would love to see it! 


The above had different ingredients mixed in and on top of the wet flour/PVA mix. The poppy seeds and lentils were particularly good. I think the sawdust will prove interesting when it's painted too.


Drying takes some time! 

I thoroughly enjoyed this investigation into different textures and using a variety of materials to create different effects. I think it was great fun to have the time and space to just experiment and see what happens! 

Mel did use acrylic paints to colour her covers, the paint goes onto the PVA surface really well.


Never underestimate the power of PLAY !
Thank you Mel for this great activity!